The previous example does not work well. This is much better and faster:
<?php
$Randomized = rand(1,20);
for($i=0;$i<=$Randomized;$i++){$data[$i]=rand(2,20);};//full array with garbage.
$imgx='600';$imgy='400';//Set Image Size. ImageX,ImageY
$cx = '300';$cy ='150'; //Set Pie Postition. CenterX,CenterY
$sx = '600';$sy='300';$sz ='100';// Set Size-dimensions. SizeX,SizeY,SizeZ
$data_sum = array_sum($data);
//convert to angles.
for($i=0;$i<=$Randomized;$i++){
$angle[$i] = (($data[$i] / $data_sum) * 360);
$angle_sum[$i] = array_sum($angle);
};
$im = imagecreate ($imgx,$imgy);
$background = imagecolorallocate($im, 255, 255, 255);
//Random colors.
for($i=0;$i<=$Randomized;$i++){
$r=rand(100,255);$g=rand(100,255);$b=rand(100,255);
$colors[$i] = imagecolorallocate($im,$r,$g,$b);
$colord[$i] = imagecolorallocate($im,($r/1.5),($g/1.5),($b/1.5));
}
//3D effect.
for($z=1;$z<=$sz;$z++){
// first slice
imagefilledarc($im,$cx,($cy+$sz)-$z,$sx,$sy,0
,$angle_sum[0],$colord[0],IMG_ARC_EDGED);
for($i=1;$i<=$Randomized;$i++){
imagefilledarc($im,$cx,($cy+$sz)-$z,$sx,$sy,$angle_sum[$i-1]
,$angle_sum[$i],$colord[$i],IMG_ARC_NOFILL);
};
};
//Top pie.
// first slice
imagefilledarc($im,$cx,$cy,$sx,$sy,0 ,$angle_sum[0], $colors[0], IMG_ARC_PIE);
for($i=1;$i<=$Randomized;$i++){
imagefilledarc($im,$cx,$cy,$sx,$sy,$angle_sum[$i-1] ,$angle_sum[$i], $colors[$i], IMG_ARC_PIE);
};
//Output.
header('Content-type: image/png');
imagepng($im);
imagedestroy($im);
?>
PHP.mk документација
imagefilledarc
Почист и полокален преглед на PHP референцата, со задржана структура од PHP.net и подобра читливост за примери, секции и белешки.
Патека
function.imagefilledarc.php
Локална патека за оваа страница.
Извор
php.net/manual/en
Оригиналниот HTML се реупотребува и локално се стилизира.
Режим
Прокси + превод во позадина
Кодовите, табелите и белешките остануваат читливи во истиот тек.
Референца
function.imagefilledarc.php
imagefilledarc
Референца за `function.imagefilledarc.php` со подобрена типографија и навигација.
imagefilledarc
(PHP 4 >= 4.0.6, PHP 5, PHP 7, PHP 8)
imagefilledarc — Нацртај делумен лак и пополни го
= NULL
imagefilledarc(
GdImage
int
int
int
int
int
int
int
int
): true
GdImage
$image,int
$center_x,int
$center_y,int
$width,int
$height,int
$start_angle,int
$end_angle,int
$color,int
$style): true
Црта делумен лак центриран на дадената координата во дадениот image.
Параметри
-
image А GdImage не применува никакво полнење, така што ширината на сликата мора да биде множител на 8. Ова ограничување веќе не важи од PHP 7.0.9. imagecreatetruecolor().
center_x-
x-координата на центарот.
center_y-
y-координата на центарот.
width-
Ширина на лакот.
height-
Висина на лакот.
start_angle-
Аголот на почеток на лакот, во степени.
end_angle-
Аголот на крај на лакот, во степени. 0° е на позицијата три часот, а лакот се црта во насока на стрелките на часовникот.
color-
Низата што треба да се напише. imagecolorallocate().
style-
Бинарно ИЛИ од следниве можности:
IMG_ARC_PIEandIMG_ARC_CHORDсе меѓусебно исклучуваат;IMG_ARC_CHORDсамо ги поврзува почетниот и крајниот агол со права линија, додекаIMG_ARC_PIEсоздава заоблен раб.IMG_ARC_NOFILLозначува дека лакот или тетивата треба да бидат оцртани, а не пополнети.IMG_ARC_EDGED, се користи заедно соIMG_ARC_NOFILL, означува дека почетниот и крајниот агол треба да бидат поврзани со центарот - ова е добар начин за оцртување (наместо пополнување) на 'парче пита'.
Вратени вредности
Секогаш враќа true.
Дневник на промени
| Верзија | = NULL |
|---|---|
| 8.0.0 |
image беше вратено при неуспех. GdImage
инстанца сега; претходно, валидна gd resource се очекуваше.
|
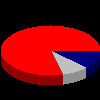
Примери
Пример #1 Создавање 3Д изглед на пита
<?php

// create image
$image = imagecreatetruecolor(100, 100);

// allocate some colors
$white    = imagecolorallocate($image, 0xFF, 0xFF, 0xFF);
$gray     = imagecolorallocate($image, 0xC0, 0xC0, 0xC0);
$darkgray = imagecolorallocate($image, 0x90, 0x90, 0x90);
$navy     = imagecolorallocate($image, 0x00, 0x00, 0x80);
$darknavy = imagecolorallocate($image, 0x00, 0x00, 0x50);
$red      = imagecolorallocate($image, 0xFF, 0x00, 0x00);
$darkred  = imagecolorallocate($image, 0x90, 0x00, 0x00);

// make the 3D effect
for ($i = 60; $i > 50; $i--) {
   imagefilledarc($image, 50, $i, 100, 50, 0, 45, $darknavy, IMG_ARC_PIE);
   imagefilledarc($image, 50, $i, 100, 50, 45, 75 , $darkgray, IMG_ARC_PIE);
   imagefilledarc($image, 50, $i, 100, 50, 75, 360 , $darkred, IMG_ARC_PIE);
}

imagefilledarc($image, 50, 50, 100, 50, 0, 45, $navy, IMG_ARC_PIE);
imagefilledarc($image, 50, 50, 100, 50, 45, 75 , $gray, IMG_ARC_PIE);
imagefilledarc($image, 50, 50, 100, 50, 75, 360 , $red, IMG_ARC_PIE);


// flush image
header('Content-type: image/png');
imagepng($image);
?>
Горниот пример ќе прикаже нешто слично на:
Белешки од корисници 16 белешки
Мајк 
пред 18 години
splogamurugan на gmail точка ком 
пред 15 години
A simple pie chart generation script.
Displays the percentage at center arc and displays the Legends with random colors.

<?php
class simplepie
{
    function __construct($width, $height, $dataArr)
    {
        $font = './verdana.ttf'; /** get it from c:/windows/fonts dir */
        $this->image = imagecreate($width,$height);
        $piewidth = $width * 0.70;/* pie area */
        $x = round($piewidth/2);
        $y = round($height/2);
        $total = array_sum($dataArr);
        $angle_start = 0;
        $ylegend = 2;
        imagefilledrectangle($this->image, 0, 0, $width, $piewidth, imagecolorallocate($this->image, 128, 128, 128));
        foreach($dataArr as $label=>$value) {
            $angle_done    = ($value/$total) * 360; /** angle calculated for 360 degrees */
            $perc          = round(($value/$total) * 100, 1); /** percentage calculated */
            $color         = imagecolorallocate($this->image, rand(0, 255), rand(0, 255), rand(0, 255));
            imagefilledarc($this->image, $x, $y, $piewidth, $height, $angle_start, $angle_done+= $angle_start, $color, IMG_ARC_PIE);
            $xtext = $x + (cos(deg2rad(($angle_start+$angle_done)/2))*($piewidth/4));
            $ytext = $y + (sin(deg2rad(($angle_start+$angle_done)/2))*($height/4));
            imagettftext($this->image, 6, 0, $xtext, $ytext, imagecolorallocate($this->image, 0, 0, 0), $font, "$perc %");
            imagefilledrectangle($this->image, $piewidth+2, $ylegend, $piewidth+20, $ylegend+=20, $color);
            imagettftext($this->image, 8, 0, $piewidth+22, $ylegend, imagecolorallocate($this->image, 0, 0, 0), $font, $label);
            $ylegend += 4;
            $angle_start = $angle_done;
        }
    }
    function render()
    {
        header('Content-type: image/png');
        imagepng($this->image);
    }
}
/** usage */
$dataArr = array(2001=>10, 2002=>30, 2003=>50, 2004=>10);
$width=600;
$height=480;
$pie = new simplepie($width, $height, $dataArr);
$pie->render();
?>
vrp76 на mail точка ru 
пред 9 години
The analogue of the function

<?php

function myimagefilledarc($image, $cx, $cy, $width, $height, $start, $end, $color, $style = IMG_ARC_PIE){

    $delta = 0.1;
    $twoPi = 2*pi();

    $w = $width/2;
    $h = $height/2;

    if($h<=$w){
        $kx=$w;
        $ky=$w*$h/$w;
    }else{
        $kx=$h*$w/$h;
        $ky=$h;
    }

    $StartRad = deg2rad($start);
    $EndRad   = deg2rad($end);

    $array_points[] = $cx;
    $array_points[] = $cy;

    $a = $StartRad;

    if($style==IMG_ARC_PIE
     or $style==IMG_ARC_EDGED
     or $style==(IMG_ARC_PIE|IMG_ARC_NOFILL)
     or $style==(IMG_ARC_EDGED|IMG_ARC_NOFILL)){

        if($StartRad>=$EndRad){

            $b[] = $twoPi;
            $b[] = $EndRad;

        }else $b[] = $EndRad;

    }else $b[] = 0;

    foreach($b as $vb){
        do {
            $array_points[] = $cx + $kx*cos($a);
            $array_points[] = $cy + $ky*sin($a);
            $a += $delta;
        } while ($a<$vb);
        $a = 0;
    }

    $array_points[] = $cx + $kx*cos($EndRad);
    $array_points[] = $cy + $ky*sin($EndRad);

    $count_array_points    = count($array_points);
    $num_points = $count_array_points/2;

    if($style==IMG_ARC_PIE or $style==IMG_ARC_EDGED or $style==IMG_ARC_CHORD){
        imagefilledpolygon($image, $array_points, $num_points, $color);
    }elseif($style==(IMG_ARC_PIE|IMG_ARC_NOFILL)){

        $i = 1;
        $c = $count_array_points - 1;

        $x1 = $array_points[++$i];
        $y1 = $array_points[++$i];

        do {
            $x2 = $array_points[++$i];
            $y2 = $array_points[++$i];
            imageline($image, $x1, $y1, $x2, $y2, $color);
            $x1 = $x2;
            $y1 = $y2;
        } while ($i<$c);

    }elseif($style==(IMG_ARC_CHORD|IMG_ARC_NOFILL) or $style==(IMG_ARC_PIE|IMG_ARC_NOFILL)){
        imageline($image, $array_points[2], $array_points[3], $array_points[4], $array_points[5], $color);
    }else{
        imagepolygon($image, $array_points, $num_points, $color);
    }

}

$image = imagecreatetruecolor(900, 1250);

$white        = imagecolorallocate($image, 0xFF, 0xFF, 0xFF);
$gray[]     = imagecolorallocate($image, 0xC0, 0xC0, 0xC0);
$gray[]     = imagecolorallocate($image, 0x90, 0x90, 0x90);
$navy[]     = imagecolorallocate($image, 0x00, 0x00, 0x80);
$navy[]     = imagecolorallocate($image, 0x00, 0x00, 0x50);
$red[]      = imagecolorallocate($image, 0xFF, 0x00, 0x00);
$red[]      = imagecolorallocate($image, 0x90, 0x00, 0x00);
$yellow[]    = imagecolorallocate($image, 0xFF, 0xFF, 0x00);
$yellow[]    = imagecolorallocate($image, 0x90, 0x90, 0x00);

$Cx = 200;
$Cy = 100;

$W = 300;
$H = 100;

$Dx = 500;
$Dy = 0;
$Dy_3d = 40;

$Angles['yellow']    = array(180,0);
$Angles['gray']        = array(0,88);
$Angles['navy']        = array(88,92);
$Angles['red']        = array(92,180);

$styles['IMG_ARC_PIE'] = IMG_ARC_PIE;

$styles['IMG_ARC_CHORD'] = IMG_ARC_CHORD;

$styles['IMG_ARC_PIE|IMG_ARC_NOFILL'] = IMG_ARC_PIE|IMG_ARC_NOFILL;

$styles['IMG_ARC_CHORD|IMG_ARC_NOFILL'] = IMG_ARC_CHORD|IMG_ARC_NOFILL;

$styles['IMG_ARC_PIE|IMG_ARC_EDGED|IMG_ARC_NOFILL'] = IMG_ARC_PIE|IMG_ARC_EDGED|IMG_ARC_NOFILL;

$styles['IMG_ARC_CHORD|IMG_ARC_EDGED|IMG_ARC_NOFILL'] = IMG_ARC_CHORD|IMG_ARC_EDGED|IMG_ARC_NOFILL;

imagestring($image, 5, 130, 15, 'imagefilledarc', $white);

imagestring($image, 5, 130 + $Dx, 15, 'myimagefilledarc', $white);

foreach($styles as $name_style => $style){


    for ($i = $Cy+$Dy_3d; $i > $Cy; $i--) {
        foreach($Angles as $colors=>$angle){
            imagefilledarc($image, $Cx, $i+$Dy, $W, $H, $angle[0], $angle[1],$$colors[1], $style);
        }
    }

    foreach($Angles as $colors=>$angle){
        imagefilledarc($image, $Cx, $Cy+$Dy, $W, $H, $angle[0], $angle[1],$$colors[0], $style);
    }


    for ($i = $Cy+$Dy_3d; $i > $Cy; $i--) {
        foreach($Angles as $colors=>$angle){
            myimagefilledarc($image, $Cx+$Dx, $i+$Dy, $W, $H, $angle[0], $angle[1],$$colors[1], $style);
        }
    }

    foreach($Angles as $colors=>$angle){
        myimagefilledarc($image, $Cx+$Dx, $Cy+$Dy, $W, $H, $angle[0], $angle[1],$$colors[0], $style);
    }

    imagestring($image, 5, 450-strlen($name_style)*8/2, $Cy+$Dy+$H-10, $name_style, $yellow[0]);

    $Dy+=200;
}


header('Content-type: image/png');
imagepng($image);
imagedestroy($image);

?>
caist - www.caist.com 
пред 22 години
if you want to place a text onto the edge of a circle you need to
get a point on the circle:

$pos_x=$radius*sin(deg2rad($angle));
$pos_y=sqrt($radius*$radius-$pos_x*$pos_x);

if you want the point to be in the middle of a pie piece
you need a starting and ending angle

$pos_x=$radius*sin(deg2rad($angle_end-($angle_start)/2));
$pos_y=sqrt($radius*$radius-$pos_x*$pos_x);

hope it helps
xcoda3 на web точка de 
пред 10 години
For everyone who will use imageellipse() with a border (imagesetthickness() not working correctly).
This function simualtes the standard gd border.

<?php

function imageEllipseWithBorder($image, $centerX, $centerY, $width, $height, $color, $borderWidth)
    {
        // Calculate inner and outer strength of border
        $borderOuterStrength = (($borderWidth - 1) / 2);
        $borderInnerStrength = ((($borderWidth - 1) / 2) + 1);

        // Caculate x-/y-offset from 0/0 position to ellipse center
        $ellipseXOffset = $centerX - ($width / 2) - $borderOuterStrength;
        $ellipseYOffset = $centerY - ($height / 2) - $borderOuterStrength;

        // Create temp image for editing
        $tempImageWidth  = $width + ($borderOuterStrength * 2) + 1;
        $tempImageHeight = $height + ($borderInnerStrength * 2) + 1;
        $tempImage = imagecreatetruecolor($tempImageWidth, $tempImageHeight);
        imagealphablending($tempImage, false);

        // Fill temp image with "transparent" color
        $transparent = imagecolorallocatealpha($tempImage, 255, 255, 255, 127);
        imagefill($tempImage, 0, 0, $transparent);

        // Draw outer ellipse (representing the border)
        imagefilledellipse(
            $tempImage,
            $centerX - $ellipseXOffset,
            $centerY - $ellipseYOffset,
            $width  + $borderOuterStrength * 2,
            $height + $borderOuterStrength * 2,
            $color
        );

        // Draw inner ellipse (transparent area)
        imagefilledellipse(
            $tempImage,
            $centerX - $ellipseXOffset,
            $centerY - $ellipseYOffset,
            $width - $borderInnerStrength * 2,
            $height - $borderInnerStrength * 2,
            $transparent
        );

        // "Paste" ellipse (with transparent inner area) into image at original position
        imagealphablending($image, true);
        imagecopy(
            $image,
            $tempImage,
            $ellipseXOffset + ($borderWidth + 1) % 2,
            $ellipseYOffset + ($borderWidth + 1) % 2,
            0,
            0,
            $tempImageWidth,
            $tempImageHeight
        );
    }

?>
floripondia dot 88 на hotmail точка ком 
12 години пред
If you want to make a pie graph with exploded slices and data shows on each one and data side right too you can use this snippet.
<?php
$values = array("2010" => 1950, "2011" => 750, "2012" => 2100, "2013" => 580, "2014" => 5000);
$total = count($values);
$data = ($total == 0) ? array(360) : array_values($values);
$keys = ($total == 0) ? array("") : array_keys($values);
$radius = 30;
$imgx = 1800 + $radius;
$imgy = 600 + $radius;
$cx = 400 + $radius;
$cy = 200 + $radius;
$sx = 800;
$sy = 400;
$sz = 150;
$data_sum = array_sum($data);
$angle_sum = array(-1 => 0, 360);
$typo = "./helvetica.ttf";
$im = imagecreate($imgx, $imgy);
imagecolorallocate($im, 255, 255, 255);
$color = array(
    array(220, 20, 60),
    array(77, 33, 114),
    array(249, 141, 53),
    array(158, 37, 59),
    array(1, 128, 128),
    array(28, 94, 160),
    //array(206, 16, 118),
    array(43, 67, 86),
    //array(155, 108, 166),
    array(83, 69, 62)
);
shuffle($color);
shuffle($color);
shuffle($color);
$colors = array(imagecolorallocate($im, $color[0][0], $color[0][1], $color[0][2]));
$colord = array(imagecolorallocate($im, ($color[0][0] / 1.5), ($color[0][1] / 1.5), ($color[0][2] / 1.5)));
$factorx = array();
$factory = array();
for($i = 0; $i < $total; $i++){
    $angle[$i] = (($data[$i] / $data_sum) * 360);
    $angle_sum[$i] = array_sum($angle);
    $colors[$i] = imagecolorallocate($im, $color[$i][0], $color[$i][1], $color[$i][2]);
    $colord[$i] = imagecolorallocate($im, ($color[$i][0] / 1.5), ($color[$i][1] / 1.5), ($color[$i][2] / 1.5));
    $factorx[$i] = cos(deg2rad(($angle_sum[$i - 1] + $angle_sum[$i]) / 2));
    $factory[$i] = sin(deg2rad(($angle_sum[$i - 1] + $angle_sum[$i]) / 2));
}
for($z = 1; $z <= $sz; $z++){
    for($i = 0; $i < $total; $i++){
        imagefilledarc($im, $cx + ($factorx[$i] * $radius), (($cy + $sz) - $z) + ($factory[$i] * $radius), $sx, $sy, $angle_sum[$i - 1], $angle_sum[$i], $colord[$i], IMG_ARC_PIE);
    }
}
for($i = 0; $i < $total; $i++){
    imagefilledarc($im, $cx + ($factorx[$i] * $radius), $cy + ($factory[$i] * $radius), $sx, $sy, $angle_sum[$i - 1], $angle_sum[$i], $colors[$i], IMG_ARC_PIE);
    imagefilledrectangle($im, 900, 50 + ($i * 50 * 2), 950, 100 + ($i * 50 * 2), $colors[$i]);
    imagettftext($im, 50, 0, 970, 100 + ($i * 50 * 2), imagecolorallocate($im, 0, 0, 0), $typo, $keys[$i]);
    imagettftext($im, 40, 0, $cx + ($factorx[$i] * ($sx / 4)) - 40, $cy + ($factory[$i] * ($sy / 4)) + 10, imagecolorallocate($im, 0, 0, 0), $typo, $data[$i]);
}
header('Content-type: image/png');
imagepng($im);
imagedestroy($im);
?>
Кристофер Крамер 
пред 16 години
If this function is not available because you're using an old gdlib version, here is a workaround if you want to draw a pie chart:

<?php

// width and height of the image
$width=200;
$height=200;

$simulate_old_gd=true; // do not use imagefilledarc although available?

// the pieces of the pie (in degree)
$pieces=array(180,90,45,25,15,5);

$diagram=imagecreate($width,$height);

// background color
$white=imagecolorallocate($diagram, 255, 255, 255);
imagefilledrectangle($diagram,0,0,$width,$height,$white);

// the circle is 2px smaller than the image
$width-=2;
$height-=2;

// we need a border color
$black=imagecolorallocate($diagram, 0, 0, 0);

// draw the border of the pie
imagearc($diagram, round($width/2), round($height/2),
         $width, $height, 0, 360, $black);

// position (in degrees) where to place the next piece
$position=270;
// we will use calculated gray colors for simple example
$gray=0;

foreach($pieces as $deg)
 {
 // calculate the gray color
 $gray+=30;
 if($gray>255) $gray=0;
 $color=imagecolorallocate($diagram,$gray,$gray,$gray);

 // position must be kept < 360
 if($position>360) $position-=360;

 if(!$simulate_old_gd && is_callable('imagefilledarc'))
  {
  imagefilledarc($diagram, round($width/2),
  round($height/2), $width, $height, $position,
  $position+$deg, $color,IMG_ARC_EDGED);
  }
 else
  {
  // we use some maths to calculate the pixel on the circle
  $pix_x=round(floor(($width-2)/2)*cos($position/180*M_PI)
         +round($width/2));
  $pix_y=round(floor(($height-2)/2)*sin($position/180*M_PI)
         +round($height/2));
  // now we  draw a line from the mid of the circle to the
  // calculated pixel on the circle
  imageline($diagram, round($width/2), round($height/2),
            $pix_x, $pix_y, $black);
  // now we need a pixel for flood filling.
  //- We could use maths to calculate a pixel inside the
  // piece:
  //$fill_x=round(floor(($width-10)/2)*
  //        cos(($position+2)/180*M_PI)+round($width/2));
  //$fill_y=round(floor(($height-10)/2)*
  //        sin(($position+2)/180*M_PI)+round($height/2));
  //- or we could use an universal pixel with less maths ;)
  // (top mid):
  $fill_x=floor($width/2)-2;
  $fill_y=3;
  // now we flood fill the circle
  @imagefilltoborder ($diagram,$fill_x,$fill_y,$black,$color);
  /* (it does not matter here that we fill more than we need
      because the next pieces will fix this)
     IF YOU ONLY WANT ONE PIECE
     (simulate imagefilledarc) you'd have to draw
     both border lines and flood fill afterwards */
  }
 // the position of the next piece is $deg degrees further
 $position+=$deg;
 }

// output the image
header('Content-type: image/png');
imagepng($diagram);
imagedestroy($digram);
?>
[email protected] 
пред 17 години
The code below uses colors from "hans at lintoo dot dk"'s note. It delivers pie charts with labels:

<?php
$bright_list = array(
    array(255, 203, 3),
    array(220, 101, 29),
    array(189, 24, 51),
    array(214, 0, 127),
    array(98, 1, 96),
    array(0, 62, 136),
    array(0, 102, 179),
    array(0, 145, 195),
    array(0, 115, 106),
    array(178, 210, 52),
    array(137, 91, 74),
    array(82, 56, 47)
);
$dark_list = array(
    array(205, 153, 0),
    array(170, 51, 0),
    array(139, 0, 1),
    array(164, 0, 77),
    array(48, 0, 46),
    array(0, 12, 86),
    array(0, 52, 129),
    array(0, 95, 145),
    array(0, 65, 56),
    array(128, 160, 2),
    array(87, 41, 24),
    array(32, 6, 0)
);

$data = array();
$angle = array();
$title = array();
$i = 0;
foreach( $_GET as $key => $value ) {
    $data[$i] = intval($value);
    $title[$i++] = str_replace("_"," ",strval($key));
}
$sum = array_sum($data);
if( $sum == 0 ) {
    ++ $sum;
}
$count = count($data);
for( $i = 0; $i < $count; ++ $i ) {
    $angle[$i] = floor($data[$i]/$sum*360);
    if( $angle[$i] == 0 ) {
        ++ $angle[$i];
    }
}
$sum_angle = array_sum($angle);
if( $sum_angle < 360 ) {
    $angle[0]+=360-$sum_angle;
}

$height = $count*34;
if( $height < 180 ) {
    $height = 180;
}

$im  = imagecreate (350, $height);
$background = imagecolorallocate($im, 226, 226, 226);
$border = imagecolorallocate($im,97,97,97);
$font_color = imagecolorallocate($im,0,0,0);
$font = 'yourfont.ttf';

$bright = array();
foreach( $bright_list as $c ) {
    $bright[] = imagecolorallocate($im,$c[0],$c[1],$c[2]);
}

$dark = array();
foreach( $dark_list as $c ) {
    $dark[] = imagecolorallocate($im,$c[0],$c[1],$c[2]);
}
$tmp = 0;
for( $i =0; $i < $count; ++ $i ) {
    for( $j = 100; $j > 90; -- $j ) {
        imagefilledarc($im, 100, $j, 180, 120, $tmp, $tmp+$angle[$i], $dark[$i], IMG_ARC_PIE);
    }
    $tmp += $angle[$i];
}

$tmp = 0;
for( $i =0; $i < $count; ++ $i ) {
    imagefilledarc($im, 100, 90, 180, 120, $tmp, $tmp+$angle[$i], $bright[$i], IMG_ARC_PIE);
    $tmp += $angle[$i];
}
for( $i = 0; $i < $count; ++ $i ) {
    imagefilledrectangle($im, 209, 19+($i*30), 231, 41+($i*30), $border);
    imagefilledrectangle($im, 210, 20+($i*30), 230, 40+($i*30), $bright[$i]);
    imagefttext($im, 11, 0, 240, 34+($i*30), $font_color, $font, $title[$i]);
}
header('Content-type: image/png');
imagepng($im);
imagedestroy($im);
?>

try 'pie.php?foo=3&bar=4&baz=6'
[email protected] 
20 години пред
The previous example does not work. Try those modifications and you will have the expected results :

<?
$Randomized = rand(1,20);
for($i=0;$i<=$Randomized;$i++){$data[$i]=rand(2,20);};//full array with garbage.
$imgx='200';$imgy='200';//Set Image Size. ImageX,ImageY
$cx = '100';$cy ='50'; //Set Pie Postition. CenterX,CenterY
$sx = '200';$sy='100';$sz ='20';// Set Size-dimensions. SizeX,SizeY,SizeZ

$data_sum = array_sum($data);
//convert to angles.
for($i=0;$i<=$Randomized;$i++){
   $angle[$i] = (($data[$i] / $data_sum) * 360);
   $angle_sum[$i] = array_sum($angle);
};
$im  = imagecreate ($imgx,$imgy);
$background = imagecolorallocate($im, 255, 255, 255);
//Random colors.
for($i=0;$i<=$Randomized;$i++){
   $r=rand(100,255);$g=rand(100,255);$b=rand(100,255);
   $colors[$i] = imagecolorallocate($im,$r,$g,$b);
   $colord[$i] = imagecolorallocate($im,($r/2),($g/2),($b/2));
}
//3D effect.
for($z=1;$z<=$sz;$z++){
   for($i=1;$i<=$Randomized;$i++){
imagefilledarc($im,$cx,($cy+$sz)-$z,$sx,$sy,$angle_sum[$i-1]
,$angle_sum[$i],$colord[$i],IMG_ARC_PIE);
   };
};
//Top pie.
for($i=1;$i<=$Randomized;$i++){
   imagefilledarc($im,$cx,$cy,$sx,$sy,$angle_sum[$i-1] ,$angle_sum[$i], $colors[$i], IMG_ARC_PIE);
};
//Output.
header('Content-type: image/png');
imagepng($im);
imagedestroy($im);
?>
[email protected] 
20 години пред
Here's a slightly better way to get the colours for the pie chart shaded wall as posted by double-zonk at wp dot pl

<?php

$rgb0 = array (255, 153, 204);
$rgb1 = array (255, 153, 0);
$rgb2 = array (153, 204, 0);
$rgb3 = array (51, 153, 102);
$rgb4 = array (51, 204, 204);
$rgb5 = array (51, 102, 255);
$rgb6 = array (128, 0, 128);
$rgb7 = array (150, 150, 150);

for ($r = 0; $r < 8; ++$r)
    {
        if(${"rgb" . $r}[0] < 50) $shadowr = 0; else $shadowr = ${"rgb" . $r}[0] - 50;
        if(${"rgb" . $r}[1] < 50) $shadowg = 0; else $shadowg = ${"rgb" . $r}[1] - 50;
        if(${"rgb" . $r}[2] < 50) $shadowb = 0; else $shadowb = ${"rgb" . $r}[2] - 50;
        ${"wall" . $r} = array ($shadowr, $shadowg, $shadowb);
    }

for ($s = 0; $s < 8; ++$s)
    {
        $kolor[$s] = imagecolorallocate($image, ${"rgb" . $s}[0], ${"rgb" . $s}[1], ${"rgb" . $s}[2]);
        $cien[$s] = imagecolorallocate($image, ${"wall" . $s}[0], ${"wall" . $s}[1], ${"wall" . $s}[2]);
    }

?>
[email protected] 
21 години пред
Even more efficiency:

The original code snippet and the following suggestions are inefficient in that they rely on the overlying php to fill vertically using loops rather than taking advantage of the underlying drawing routines. Also, this is done by repeatedly drawing filled partial elipses and circular calculations are typically expensive (PHP may use tables, I'm not sure) The original code could be rewritten as

<?php
// Add the bottom layer.
  imagefilledarc($image, 50, 60, 100, 50, 0, 45, $darknavy, IMG_ARC_PIE);
  imagefilledarc($image, 50, 60, 100, 50, 45, 75 , $darkgray, IMG_ARC_PIE);
  imagefilledarc($image, 50, 60, 100, 50, 75, 360 , $darkred, IMG_ARC_PIE);

//Now do the joining pieces.
//Note: Precompute cosines and sines for efficiency
  $c1=50*cos(45/180*M_PI);
  $s1=25*sin(45/180*M_PI);
  $c2=50*cos(75/180*M_PI);
  $s2=25*sin(75/180*M_PI);

  $area1=array(100,60,100,50,50+$c1,50+$s1,50+$c1,60+$s1);
  $area2=array(50+$c1,50+$s1,50+$c1,60+$s1,50+$c2,60+$s2,50+$c2,50+$s2);
//Note that piece 3 goes round the corner. So we are only interested in the leftmost extent. You would need to do this programatically. Also, you do not need to make vertical parts for any segments completely at the back of the pie (in fact, not filledarcs either)
  $area3=array(50+$c2,50+$s2,50+$c2,60+$s2,0,60,0,50);

  imagefilledpolygon($image, $area1 , 4 , $darknavy);
  imagefilledpolygon($image, $area2 , 4 , $darkgray);
  imagefilledpolygon($image, $area3 , 4 , $darkred);

  imagefilledarc($image, 50, 50, 100, 50, 0, 45, $navy, IMG_ARC_PIE);
  imagefilledarc($image, 50, 50, 100, 50, 45, 75 , $gray, IMG_ARC_PIE);
  imagefilledarc($image, 50, 50, 100, 50, 75, 360 , $red, IMG_ARC_PIE);
?>

Note that the polygons are perhaps slightly inefficient. If there was an imagefilledtriangle, this code would be simpler. Given how fundamental triangles are, perhaps for a future version?

Rich
[email protected] 
21 години пред
I found some bugs in my script.. and therefore I am posting the fixes:
Bugs:
<?php
$drakcolor[2] = imagecolorallocate($im, 139, 0, 1);
//Should be
$darkcolor[2] = imagecolorallocate($im, 139, 0, 1);
?>

And then if you modify the code a little and, then make a image 200x125 then you won't be wasting space.
Changes:
<?php
$im  = imagecreate (200, 125);
// AND
for ($i = 60; $i > 50; $i--) {
    imagefilledarc($im, 100, $i, 200, 100, $anglesum[$f], $anglesum[$n], $darkcolor[$f], IMG_ARC_PIE);
}
// AND
       imagefilledarc($im, 100, 50, 200, 100, $anglesum[$n], $anglesum[$i], $randcolor[$n], IMG_ARC_PIE);
?>
you can see a online demo at: http://webstatistik.lintoo.dk/
[email protected] 
21 години пред
I modificed the code to make a 3d pie from data collected elsewhere.... in this case it was for a statistics page...

when testing you can use:

enjoy

<?php
//Making a image 200 x 200
$im  = imagecreate (200, 200);

//Setting background color
$background = imagecolorallocate($im, 226, 226, 226);

//Setting colors of elements
$randcolor[0] = imagecolorallocate($im, 255, 203, 3);
$randcolor[1] = imagecolorallocate($im, 220, 101, 29);
$randcolor[2] = imagecolorallocate($im, 189, 24, 51);
$randcolor[3] = imagecolorallocate($im, 214, 0, 127);
$randcolor[4] = imagecolorallocate($im, 98, 1, 96);
$randcolor[5] = imagecolorallocate($im, 0, 62, 136);
$randcolor[6] = imagecolorallocate($im, 0, 102, 179);
$randcolor[7] = imagecolorallocate($im, 0, 145, 195);
$randcolor[8] = imagecolorallocate($im, 0, 115, 106);
$randcolor[9] = imagecolorallocate($im, 178, 210, 52);
$randcolor[10] = imagecolorallocate($im, 137, 91, 74);
$randcolor[11] = imagecolorallocate($im, 82, 56, 47);

//Setting the darker alt color to the main color
$darkcolor[0] = imagecolorallocate($im, 205, 153, 0);
$darkcolor[1] = imagecolorallocate($im, 170, 51, 0);
$drakcolor[2] = imagecolorallocate($im, 139, 0, 1);
$darkcolor[3] = imagecolorallocate($im, 164, 0, 77);
$darkcolor[4] = imagecolorallocate($im, 48, 0, 46);
$darkcolor[5] = imagecolorallocate($im, 0, 12, 86);
$darkcolor[6] = imagecolorallocate($im, 0, 52, 129);
$darkcolor[7] = imagecolorallocate($im, 0, 95, 145);
$darkcolor[8] = imagecolorallocate($im, 0, 65, 56);
$darkcolor[9] = imagecolorallocate($im, 128, 160, 2);
$darkcolor[10] = imagecolorallocate($im, 87, 41, 24);
$darkcolor[11] = imagecolorallocate($im, 32, 6, 0);

//Getting the data from GET
$i = 0;
while ($i <= 11) {
$data[$i] = $_GET[++$i];
}

//Getting ready
$datasum = array_sum($data);
$anglesum[0] = 0;
$angle[0] = 0;
$i = 0;

//Calc the start and end angle position of the elements
while ($i <= 11) {
    ++$i;
    $n = $i - 1;
    $part[$i] = $data[$n] / $datasum;
    $angle[$i] = floor($part[$i] * 360);
    $anglesum[$i] = array_sum($angle);
}

/*
//DEBUGGING - only for testing purposes
echo "<pre>";
print_r($part);
print_r($anglesum);
print_r($angle);
*/

// make the 3D effect
$n = 0;$i=0;
while ($n <= 11) {
    ++$n;
    $f = $n - 1;
    if ($angle[$n] != 0) {
        for ($i = 110; $i > 100; $i--) {
            imagefilledarc($im, 100, $i, 200, 100, $anglesum[$f], $anglesum[$n], $darkcolor[$f], IMG_ARC_PIE);
        }
    }
}

//make the 2d data that sits above the 3deffect
$i = 0;
while ($i <= 11) {
    ++$i;
    $n = $i - 1;
    if ($angle[$i] != 0) {
       imagefilledarc($im, 100, 100, 200, 100, $anglesum[$n], $anglesum[$i], $randcolor[$n], IMG_ARC_PIE);
    }
}

// flush image
header('Content-type: image/png');
imagepng($im);
imagedestroy($im);
?>
[email protected] 
21 години пред
for nice colors and adapted shadows from amount of values i try:

<?php
function _errechne_gradzahlen( $werte ) {         /* calc degrees */
    foreach( $werte as $wert ) { $sum += $wert; }
    foreach( $werte as $wert ) { $gradzahlen[] = 360 * ( $wert / $sum ); }
    return $gradzahlen;
}

function _randomcol ( $im ) {
    return imagecolorallocate( $im, rand(100, 224), rand(100, 224), rand(128, 224) );
}

$values = array( 100, 200, 50, 100, 43, 32 );    /* the data to display ( real values ) */
$werte = _errechne_gradzahlen( $values );        /* degrees-array */
$width = 200;
$height = 200;
$half_width = floor( $width / 2 );
$half_height = floor($height / 2);

$im = ImageCreateTrueColor( $width, $height );

foreach( $werte as $key => $wert ) {
    /* get colors and shadows */
    $color = _randomcol( $im );
    $shadow = $color - 20000;                 // or brighter shadows take 10000
    $colors[] = $color;
    $shadows[] = $shadow;
/* 3D effekt */
     for ($i = ($half_height + 10); $i > $half_height; $i--) {
        imagefilledarc(
                    $im,
                    $half_width,  $i,
                    $width, $half_height,
                    $offset, ($offset + $wert),   // from, to (degrees)
                    $shadows[$key], IMG_ARC_NOFILL);
    }
    $offset = $offset + $wert;
}
$offset = 0;

foreach( $werte as $key => $wert ) {             /* an now draw the top */
    imagefilledarc(
                $im,
                $half_width, $half_width,
                $width, $half_height,           // half sized
                $offset, ($offset + $wert),
                $colors[$key], IMG_ARC_PIE);
    $offset = $offset + $wert;
}
header( "Content-type: image/png" );
imagepng ( $im );
imagedestroy( $im );
?>

sry for my crab english and the disordered code, i cut and 'translate' it from a class i wrote before.
poopie 
21 години пред
The examples given so far for drawing a 3D looking pie chart are extremely inefficient and can give a huge performance hit to scripts that draw a lot of pies and in particular those that do offline processing on disk, rather than send a single pie chart to the browser (either way this modification saves you a lot of CPU cycles).

Modify the portion of the code that creates the 3D effect to only draw the outline (with IMG_ARC_NOFILL) of the pie layers below the top filled pie:

// make the 3D effect (modified for the original example)
for ($i = 60; $i >= 50; $i--) {
   imagefilledarc($image, 50, $i, 100, 50, 0, 45, $darknavy, IMG_ARC_NOFILL);
  imagefilledarc($image, 50, $i, 100, 50, 45, 75 , $darkgray, IMG_ARC_NOFILL);
  imagefilledarc($image, 50, $i, 100, 50, 75, 360 , $darkred, IMG_ARC_NOFILL);
}

Note the >= on the for loop, which fills in a gap that is created without the =
[email protected] 
21 години пред
Note that imageFilledArc() and imageArc() both take ints as degree measurements.  This is no problem if you're *only* using imageArc() and/or imageFilledArc().  However, if you're using calculated degrees and plan to superimpose other drawing elements (eg., you want to make vertical lines between the shadow 3D effect) you need to floor() your degrees before converting them to radians, otherwise you'll get precision errors.

A small example illustrating the 'feature'...

<?php
$img = imageCreate(400, 400);
$back = imageColorAllocate($img, 0, 0, 0);
$front = imageColorAllocate($img, 255, 255, 255);

$sd = 45.5;
$ed = 130.5;

imageFilledArc($img, 200, 200, 300, 300, $sd, $ed,
               $front, IMG_ARC_PIE|IMG_ARC_NOFILL|IMG_ARC_EDGED);
imageArc($img, 200, 230, 300, 300, $sd, $ed, $front);

imageLine($img,
          cos(deg2rad($sd))*150+200, sin(deg2rad($sd))*150+200,
          cos(deg2rad($sd))*150+200, sin(deg2rad($sd))*150+230,
          $front);
imageLine($img,
          cos(deg2rad($ed))*150+200, sin(deg2rad($ed))*150+200,
          cos(deg2rad($ed))*150+200, sin(deg2rad($ed))*150+230,
          $front);

header('Content-type: image/png');
imagepng($img);
imagedestroy($img);
?>

And this is how it should be...

<?php
$img = imageCreate(400, 400);
$back = imageColorAllocate($img, 0, 0, 0);
$front = imageColorAllocate($img, 255, 255, 255);

$sd = floor(45.5);
$ed = floor(130.5);

imageFilledArc($img, 200, 200, 300, 300, $sd, $ed,
               $front, IMG_ARC_PIE|IMG_ARC_NOFILL|IMG_ARC_EDGED);
imageArc($img, 200, 230, 300, 300, $sd, $ed, $front);

imageLine($img,
          cos(deg2rad($sd))*150+200, sin(deg2rad($sd))*150+200,
          cos(deg2rad($sd))*150+200, sin(deg2rad($sd))*150+230,
          $front);
imageLine($img,
          cos(deg2rad($ed))*150+200, sin(deg2rad($ed))*150+200,
          cos(deg2rad($ed))*150+200, sin(deg2rad($ed))*150+230,
          $front);

header('Content-type: image/png');
imagepng($img);
imagedestroy($img);
?>